
How to take a passport photo with your phone
You don't need an app or a photo booth. With your phone, a light wall and daylight you can take a valid photo at home for the Spanish DNI, a passport or another document. These are the steps and settings that matter most.
The essentials in 30 seconds
- A plain white wall, half a metre behind you.
- Daylight from the front; no flash.
- Normal Photo mode, no filters or Portrait mode.
- Phone at eye level, a metre and a half away with 2× zoom.
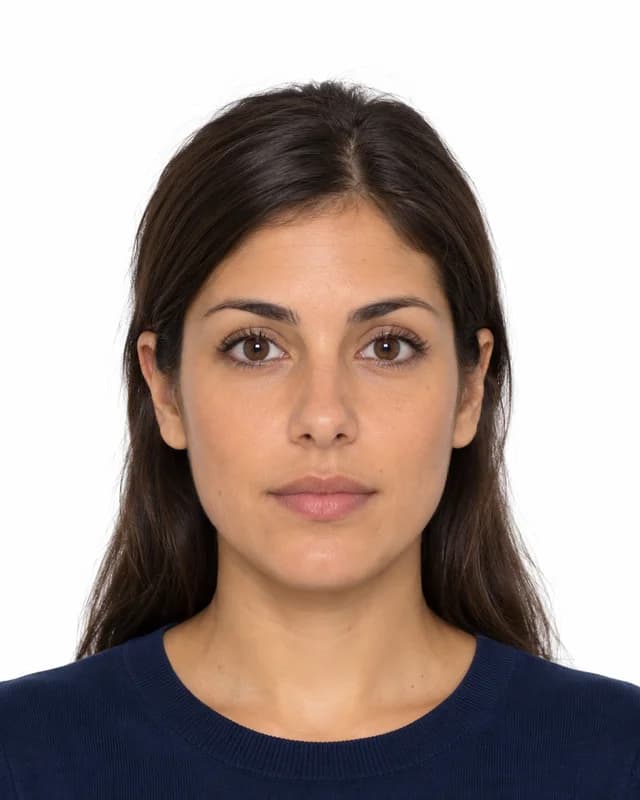
- Face forward, neutral and uncovered; leave space around you.
- Crop it to size afterwards: the Spanish DNI needs 26 × 32 mm.
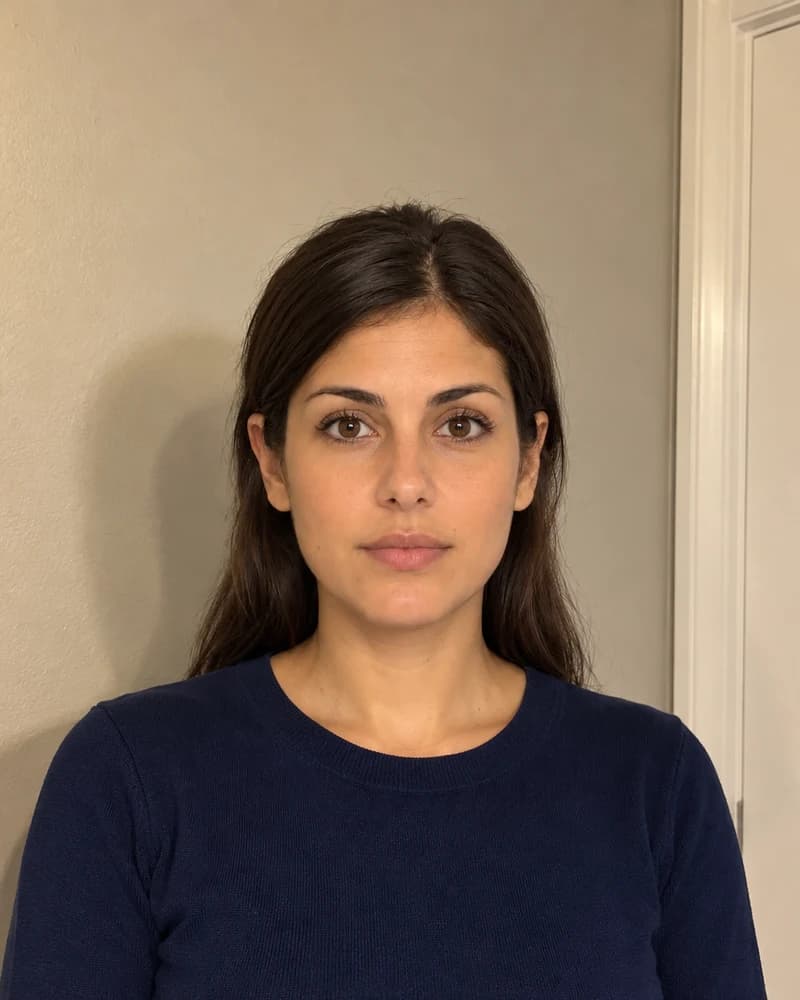
Not like this
Like this
Step by step
Four steps before cropping. It takes less than ten minutes.
- Step 1
Set up the background and light
Half of a good passport photo is decided before you open the camera.
- Stand in front of a plain white or very light wall, with no pictures, doors or sockets behind you. If you don't have one, hang a white sheet pulled tight.
- Stand half a metre from the wall: that way your shadow falls behind you and doesn't show in the background.
- Use daylight from the front: face a window, never with your back to it. Avoid ceiling lights, which leave shadows under the eyes.
- Wipe the phone's lens with a cloth: one fingerprint is enough to blur the photo.
- Step 2
Set up your phone's camera
Default settings are designed for nice photos, not for documents.
- Use the normal Photo mode, not Portrait mode: background blur crops hair and ears badly.
- Turn off filters, beauty mode and skin smoothing. The photo has to look like you as you are.
- Turn off the flash: it causes shine on the skin and glare on glasses.
- If someone else takes it, use the rear camera and 2× zoom from a metre and a half away: up close, the wide-angle lens enlarges the nose and distorts the face.
- If there's nobody to take it, prop the phone at eye level and use the 3 or 10 second timer.
- Step 3
Position yourself well
The office mainly checks your face: that it's fully visible, facing forward and free of shadows.
- Camera at eye level, neither from above nor from below.
- Head and shoulders straight, looking directly at the lens.
- Neutral expression, mouth closed and eyes wide open.
- Hair behind your ears and away from your face; your eyebrows and eyes must be visible.
- Wear a colour that contrasts with the white background: avoid white T-shirts.
- Glasses: only if you always wear them and they don't reflect. Never sunglasses or dark lenses.
- Step 4
Take several photos with room to spare
Don't try to frame the passport photo on the phone screen; that's done afterwards.
- Leave space: from mid-chest to a hand's width above your head.
- Take five or six photos in a row and keep the sharpest one.
- Zoom in on the phone and check that your eyes are in focus and there are no shadows on your face or the background.
iPhone and Android settings
Menus vary by model and version; these are the usual ones.
iPhone
- In the Camera app, choose Photo (not Portrait) and tap 2× if someone else is taking it.
- The timer is among the Camera app's controls; depending on your iOS version, they appear when you tap the arrow or swipe on the viewfinder.
- If uploading the photo gives an error, go to Settings › Camera › Formats and choose Most Compatible to save as JPG instead of HEIC. Our tools accept HEIC, but not every browser can open it.
Android
- Use your phone maker’s camera in Photo mode, not “Portrait”, “Live focus” or “Beauty”.
- In the camera's settings (gear icon), turn off face retouching and filters if they're on.
- The timer is usually in the camera's top bar or in its settings.
- Save at the highest resolution available: when cropping to 26 × 32 mm every pixel counts.
Common mistakes and how to avoid them
| Problem | Why it happens | Fix |
|---|---|---|
| Shadow on the wall behind the head | You're right against the wall or the light comes from one side. | Stand half a metre away and face the window. |
| Big nose or distorted face | A selfie with the front camera at arm's length. | Have someone take it from a metre and a half with 2× zoom, or use a tripod and the timer. |
| Yellow or orange photo | Warm light bulbs. | Take it in daylight and turn off the room's lights. |
| Blurry hair edges | Portrait mode or background blur turned on. | Switch to normal Photo mode. |
| Shaky photo | Not enough light, or the phone held in your hand. | More light, prop the phone up and use the timer. |
| Glare on glasses | Flash or a lamp in front of the lenses. | Turn off the flash, tilt your glasses slightly or take them off. |
Then: crop it, check it and print it
- 1
Crop to size
In resize a photo to passport size you choose the document and fit your face in the oval. Free, and without uploading the photo to any server.
- 2
Check the requirements
If you don’t have a white wall or aren’t sure about the light, the checked photo checks background, lighting and sharpness and makes the background white. You see the result before you pay (€7.99).
- 3
Print several copies
The 10 × 15 passport photo print template places several copies at real size to print in a shop or at home on photo paper.
Before your appointment
Check the requirements for the Spanish DNI photo or the passport photo. Whether the photo is accepted is always decided by the office processing the document.
Frequently asked questions
Do I need an app to take a passport photo with my phone?
No. Take the photo with your phone’s normal camera and crop it in your browser with our free cropper. There’s nothing to install.
Does a selfie work?
It can, if you hold the phone far away at eye level and your face is forward and free of shadows. Up close, the front camera’s wide-angle lens distorts the face; it’s better if someone else takes it or you use the timer.
What if I don't have a white wall?
Hang a white sheet or a large piece of white card pulled tight. If the background still isn’t even, the checked photo makes it white for you.
Can I wear glasses in the Spanish DNI photo?
Ordinary glasses are accepted if your eyes are clearly visible and there’s no glare. Sunglasses or dark lenses are not.
What size does the photo have to be?
For the Spanish DNI and the Spanish passport, 26 × 32 mm (26 wide by 32 tall). For other documents, choose the country and document in the tool and it adjusts automatically.
Where do I print the photo?
At a photo shop, a photo kiosk or at home on photo paper. Print the 10 × 15 cm sheet at 100%, without fitting it to the page.
Tools for your photo
Resize a photo to passport sizeFree
Crop your phone photo to your document's size.
Spanish DNI photo
Requirements and cropping to 26 × 32 mm.
Print passport photosFree
A 10 × 15 cm sheet with several copies at real size.
Booth, shop or at home?
What each option costs and includes.